
Take a double exposure in-camera
Just ordered an iced chai latte in true Jordan style, clicked "play" on my favorite blogging playlist, and it's time to share this camera trick I just found on my digital camera! It turns out that it's really easy to do a double exposure in-camera.
So if you're wondering how to create a double exposure or looking for an easy in-camera double exposure tutorial, this is for you!
This means you don't need to mess with Photoshop layers and adjustments. Just import your double exposure into Lightroom, edit it and share away. And please, please share your work. Your art and work and YOU matter. Don't know how to use Lightroom? Don't worry — I'll show you how to get started in Lightroom right here (click).
Double exposure tutorial
First thing to note: I'm working with the Canon 5D Mark III and the process will look different for each camera. Not all cameras have the capability, but a quick google search will verify that for you.
Even if you're not shooting with the 5D Mark III, I'm going to share my step-by-step process and exactly what I learned along the way with the hope of helping no matter what camera you're working with.
Step 1: Understanding the two images you'll need for a double exposure
Let's talk images! You are going to be working with two types of images: structure and pattern. You can be as creative as you want with this process, but overlaying a structure and pattern is the foundation of a double exposure.
"Now hold on there, Jordan Brittley! You said we didn't have to work with Photoshop and I don't like you throwing around words like 'overlay.'"
Fine, fine. *Shooting a structure and pattern is the foundation of a double exposure.
The images you'll need to shoot:
1) Image with a clear structure
2) Image with a pattern — vague, blurry, or refined and clear all work great
Step 2: Find your structure image for the double exposure
You can work with a client or subject for this or you could photograph a Starbucks drink — just find something with a clear structure. And no, I'm not saying I'm at Starbucks again or anything.
I've found that photographing thin lines doesn't work as well for this image unless you're shooting with a macro lens. Mostly because you want the structure to take up a lot of space in your frame. Things like trees and whispy hair only work if they are part of a larger structure — like a landscape or a person.
Step 3: Find your pattern for the double exposure
Now it's time to find your pattern! This could be a tree, flowers, a pattern on a shirt, or even your Simplified planner. What? I know. I seriously learned this double exposure thing in my car by shooting my hand out the window and finding different patterns to photograph in my car. My Simplified Planner was a natural choice! Psst! Have you seen their patterns for next year? Umm... might have had decision paralysis.
Want to see my first double exposure? It's that one of my hand out my car window and the flowers on our kitchen island. Click here and I'll show ya my instagram post!
Step 4: Turn off highlight priority
After I took said photo of my hand out the car window, I spent an hour trying to figure out why my double exposure wouldn't work. Turns out that your camera can't process an image for double exposure if "highlight tone priority" is turned on. So make sure you switch that off when you're ready for a double exposure.
You can read about why I think you should leave highlight ton priority on the rest of the time in the related post below...
Step 5: Take a photo of your structure
You'll want to slightly underexpose your image and shoot around f/2.8 or f/3.5 for your aperture. If those crazy "f/X" things scare you, I have a free PDF guide on how to shoot in manual and you can learn this in... like 30 minutes. It will change your photo game. That and shooting in RAW.
Since your camera will be compiling the structure image with the pattern image, it will add light to light. This means that if you correctly expose both images, you're going to have a slightly overexposed image for your double exposure.
Since you have highlight tone priority turned off (step 4), you'll want to make sure you don't overexpose your image.
Here's what my structure image looked like straight out of the camera...
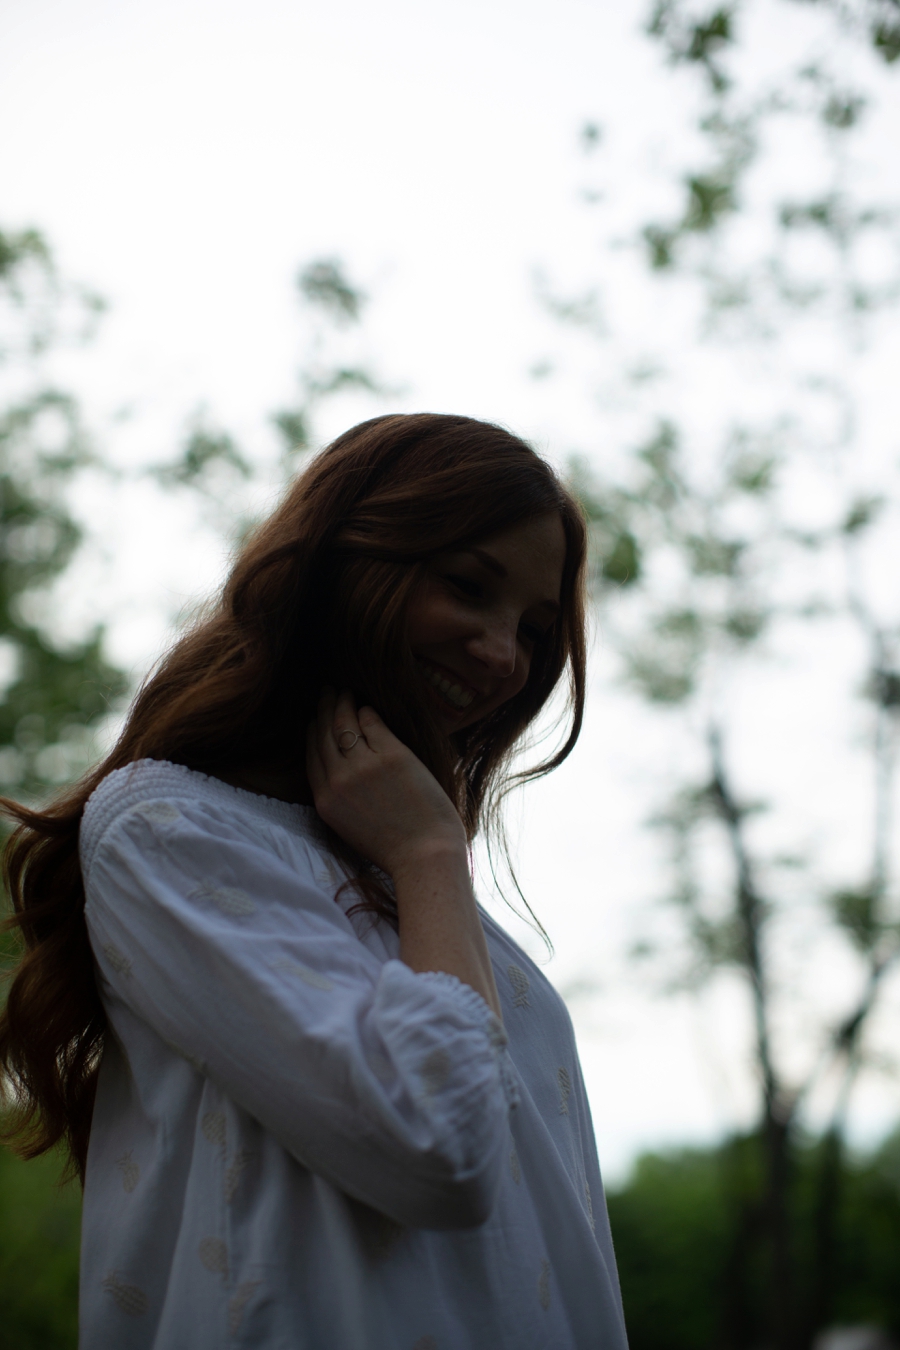
Can you say underexposed 5 times fast? Not normally how you'd want to handle your exposure, but for the structure image you really want clearly defined lines. For this image, that meant tack-sharp hair and shirt lines on my subject.
Step 6: Enable multiple exposures on your camera
Option 1 (complicated and time consuming)
On the Canon 5D Mark III, you can open your Menu settings and find the 3rd sub-menu under the very first menu — this menu and its sub-menus are color coded red. Or, if you want an easier way to do this, do option 2.
Option 2 (easy and fast)
Even easier? Just hit that little creative photo button on the left side of your camera. It looks like a paint brush and it's right below the "menu" button. It looks like this...

Once you've selected the create photo button, you'll see three option: Picture Style, Multiple Exposure and HDR. Scroll to Multiple exposure. Wasn't that so easy?!
Step 7: Get your double exposure settings right
Select the following settings for your double exposure:
*Enable multiple exposure: Disable -> On: Func/Ctrl
*this is alien for "turn on"
Multi-expos ctrl: Additive
No. of exposures: 2
Save source imgs: All images
Continue Mult-exp: Continuously
I believe that most of these settings are default so aside from enabling the multiple exposure, the other options should be pre-selected for you.
Step 8: Add your structure image to the double exposure
At the very bottom of the menu, click "Select image for multi. expo." We'll use this to plug in the image of your structure. I like doing this so that I can play around with different patterns and find what works best for that subject.
Once you've clicked "select image for multi. expo" scroll through your images and find the image you just took of your structure.
Step 9: Take a picture of your pattern for your double exposure
Now it's time to photograph your pattern! As soon as you take a picture, the Canon 5D Mark III will automatically put the images together to create a single image. Once the camera is done processing the image, you'll be able to see your double exposure on the back of your camera!
Step 10: Use this trick to make double exposures so easy
After step 8, turn on "live view" on your camera. This is a special feature with the Canon 5D Mark III + later in the series and it's so helpful when working with a double exposure.
The "live view" button is different than video mode. So after you've selected your image for multiple exposure in step 8, push the "start/stop" button on your camera. It's directly to the right of your camera's view finder.
This will allow you to see the image you've preselected "overlayed" on your camera's LCD screen. You can put your pattern in the frame, adjust your exposure, and take your image all while using live view!
It's almost cheating. Almost.
What I learned while playing around with double exposures
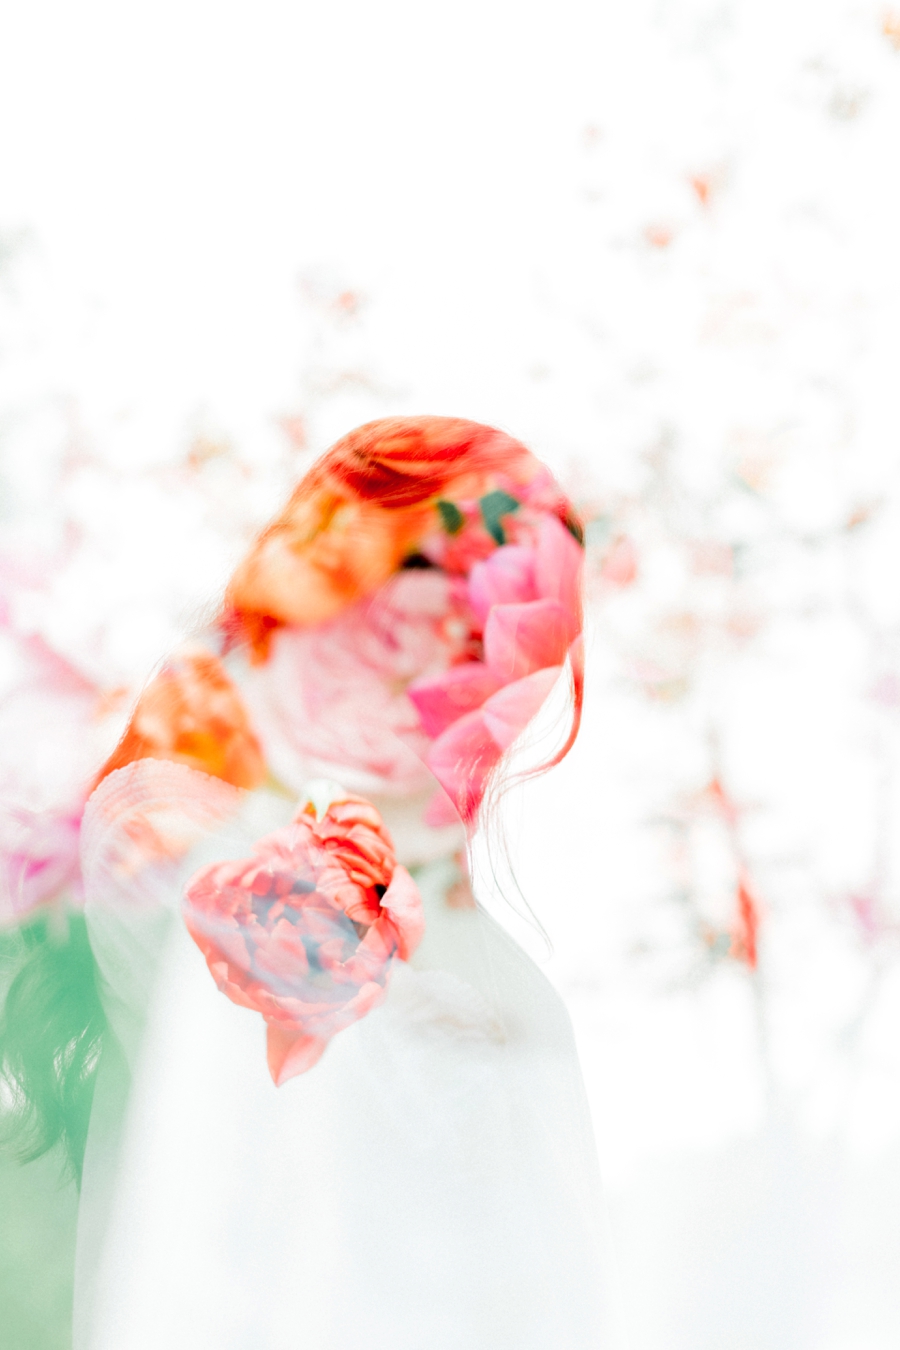
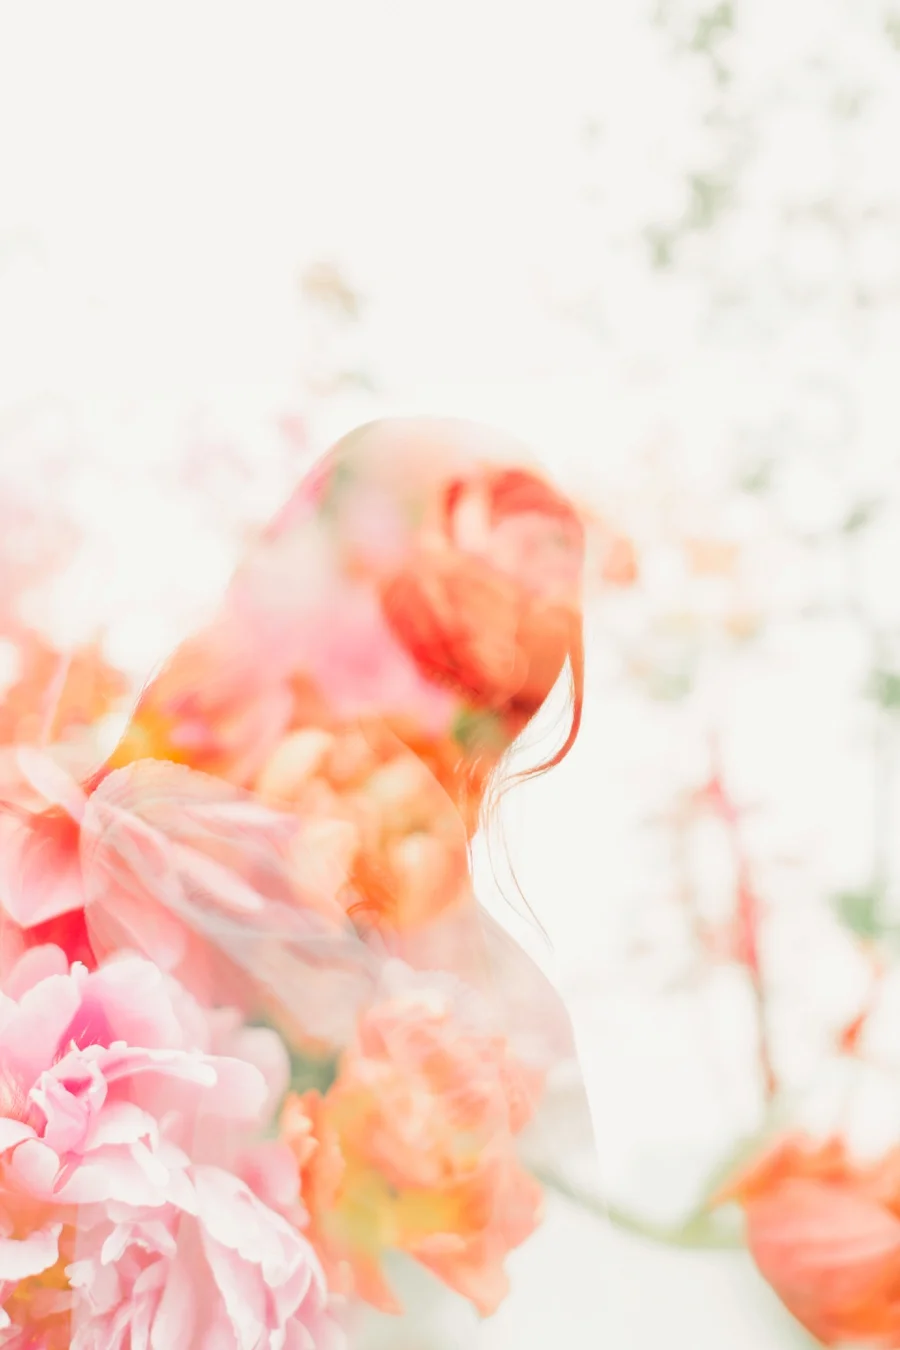
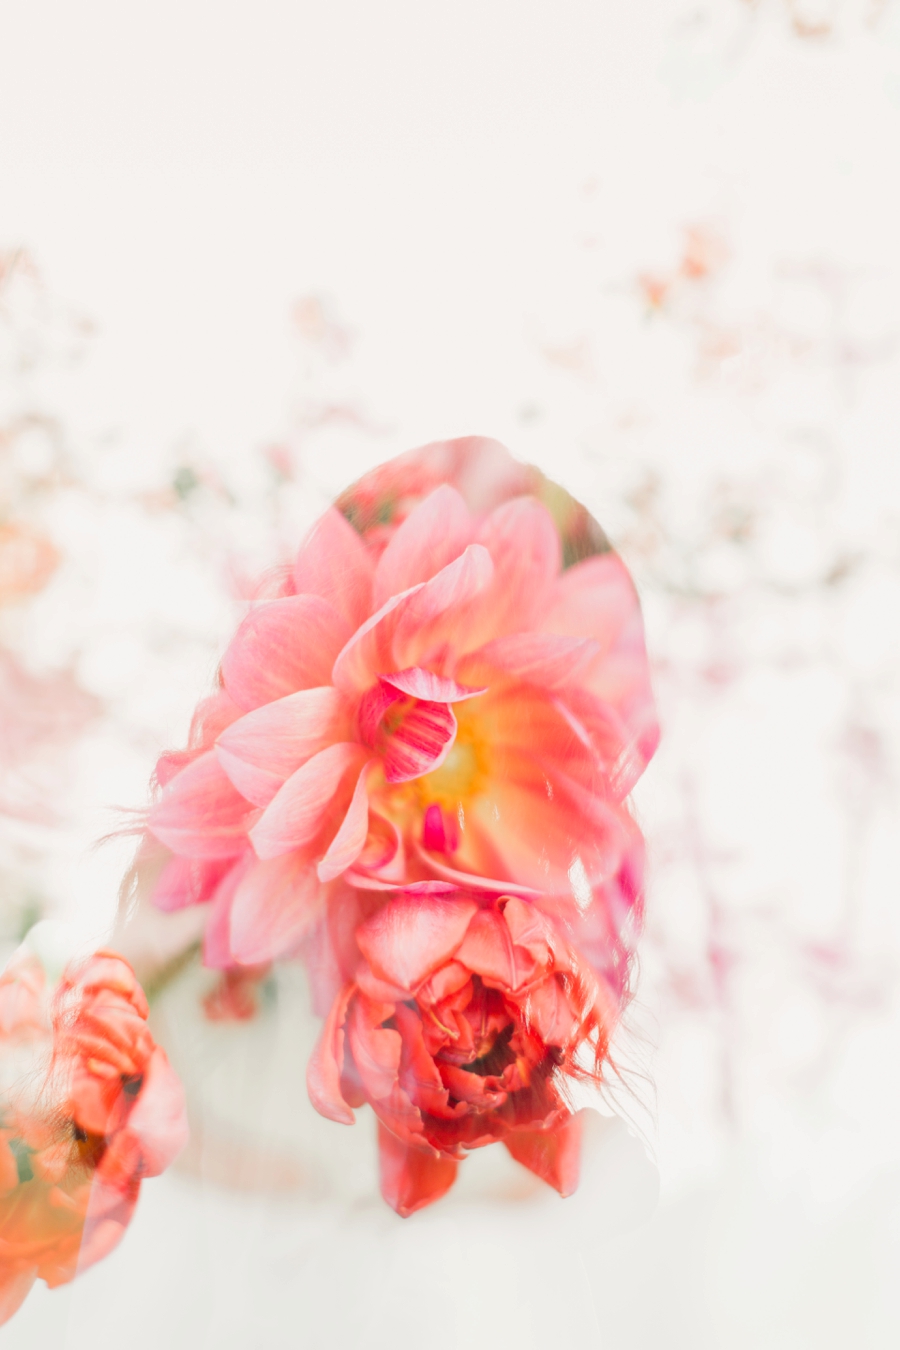
When I first set up the creative brand shoot with Charity, I knew I wanted to do a double exposure of her with her work. I'm still learning how to play around with exposures and color shifts to create a unique in-camera double exposure and I wanted to share all of the double exposures that I came up with during our shoot.
I didn't work with double exposures for very long — maybe 3-5 minutes? I just wanted to give her a few double exposures for our creative shoot that she could use for a fine art marketing approach.
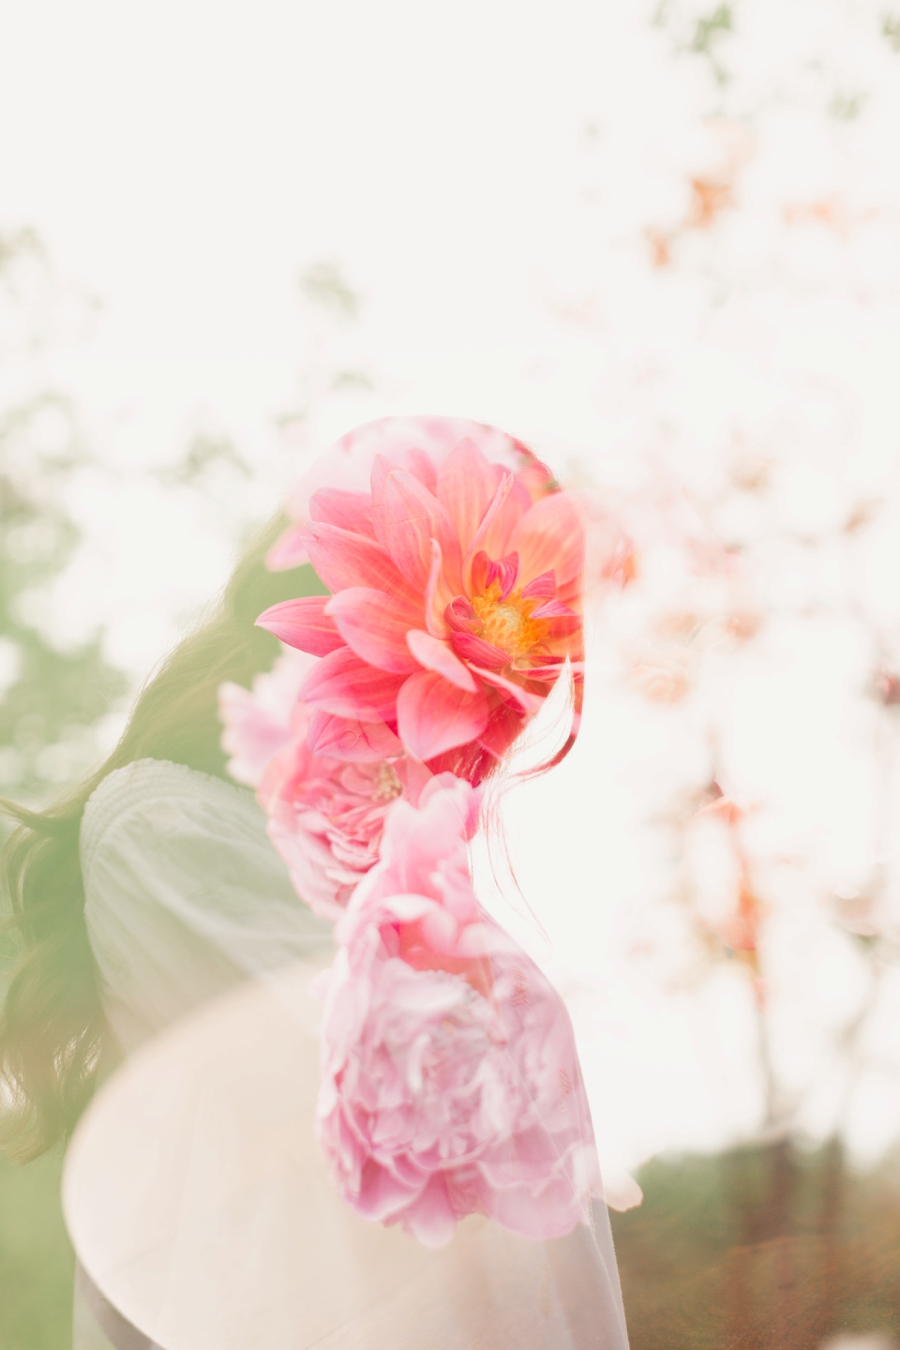
You'll see a difference in color tone and what I like to call the "creaminess factor" in the images below. My favorites were 1, 5 & 6!
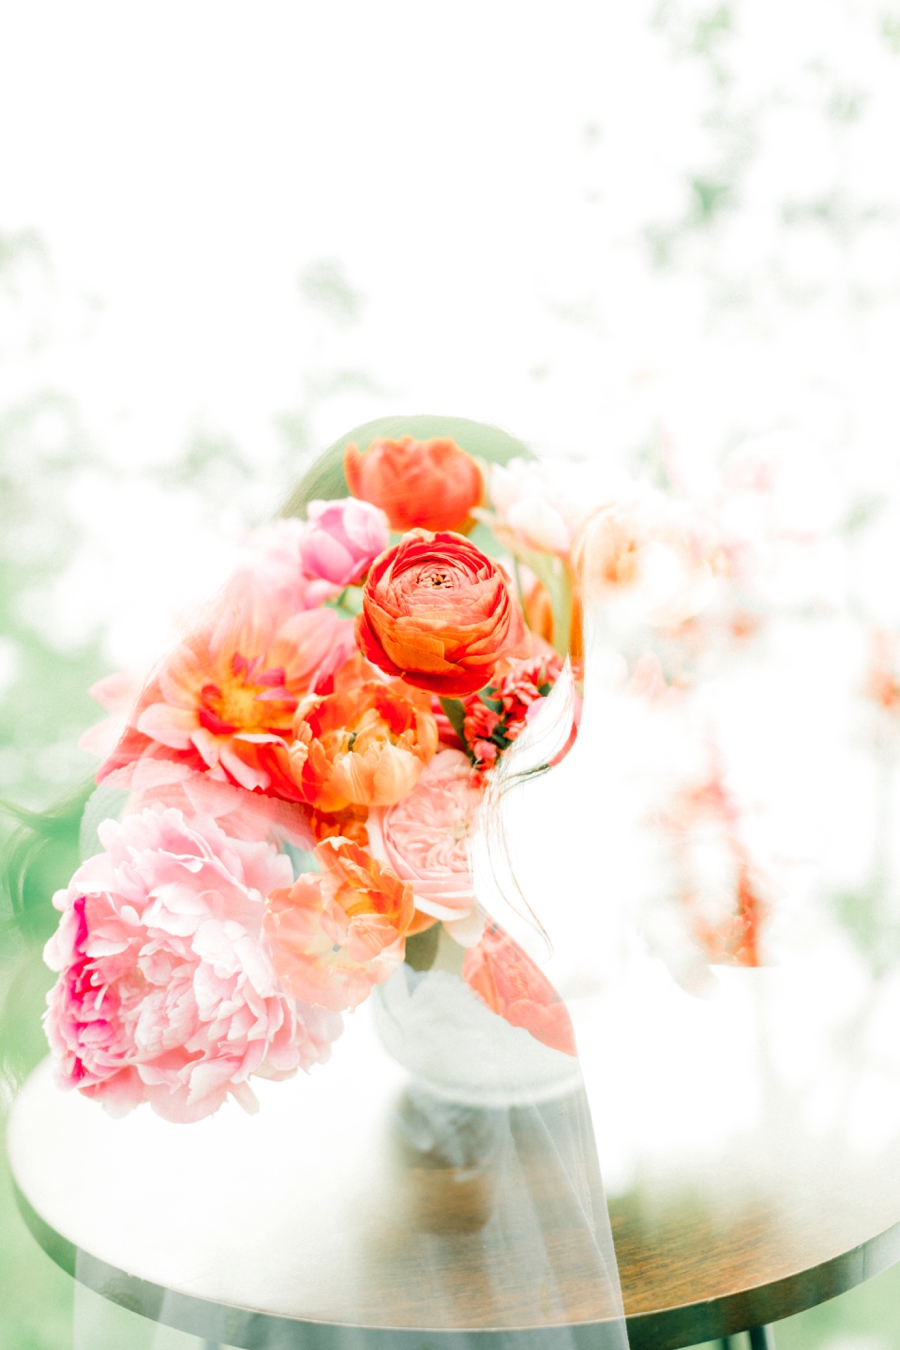
My double exposure results from start to finish
I also wanted to give you an idea of what my exposures and aperture looked like in-camera and how the camera compiled those images.
The first image in this series is my Structure Image.
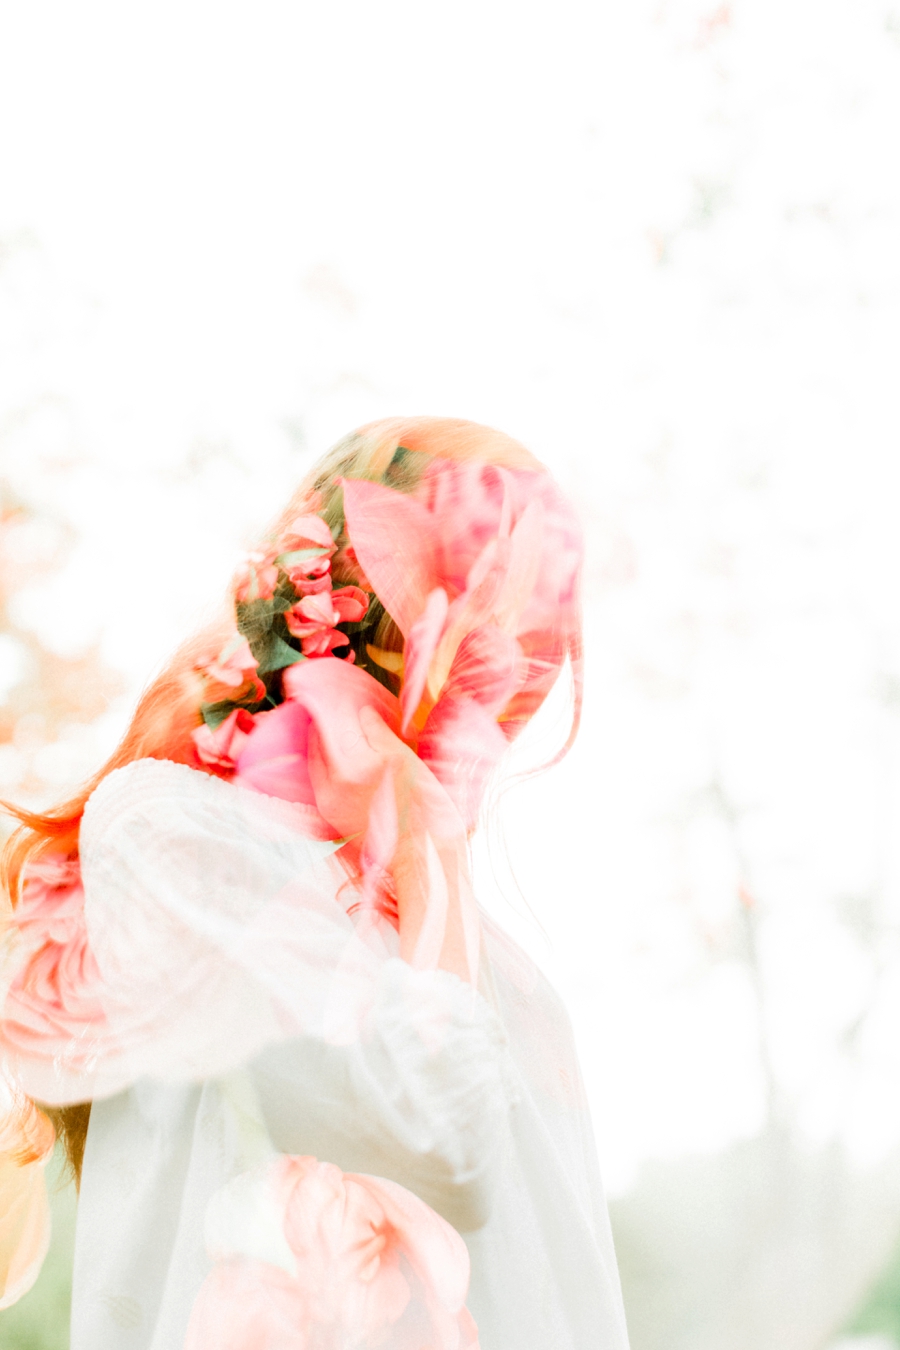
The second image in this series is my Pattern Image.
The third image is the camera's compilation of the two which is my double exposure.
The last image is my final edit for my client's final gallery. All edited with my Light and airy Brittley Preset Suite.
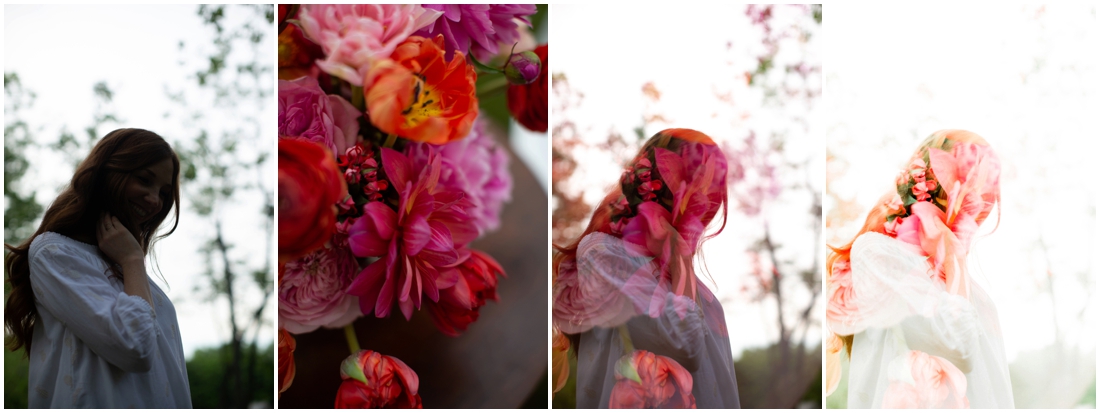
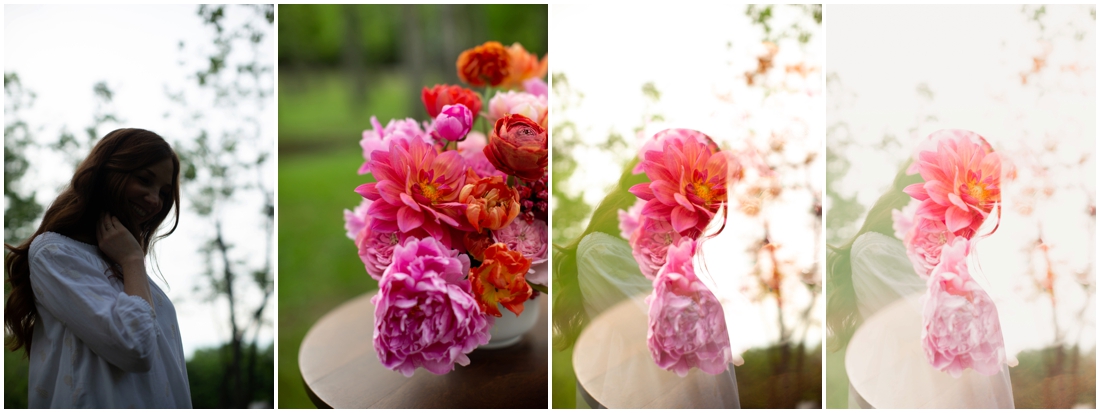
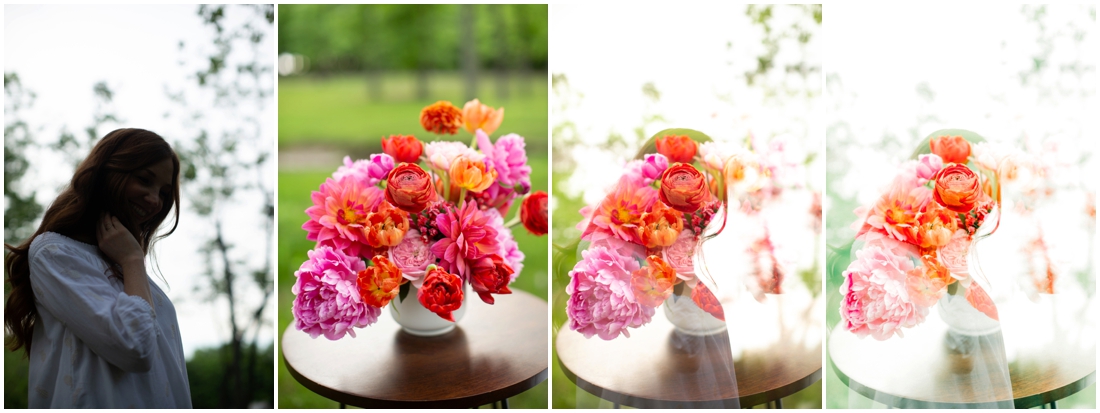
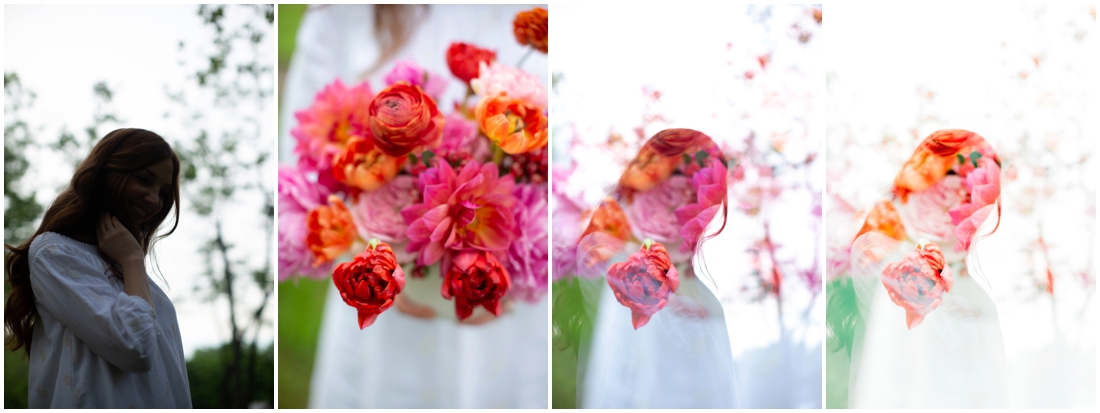
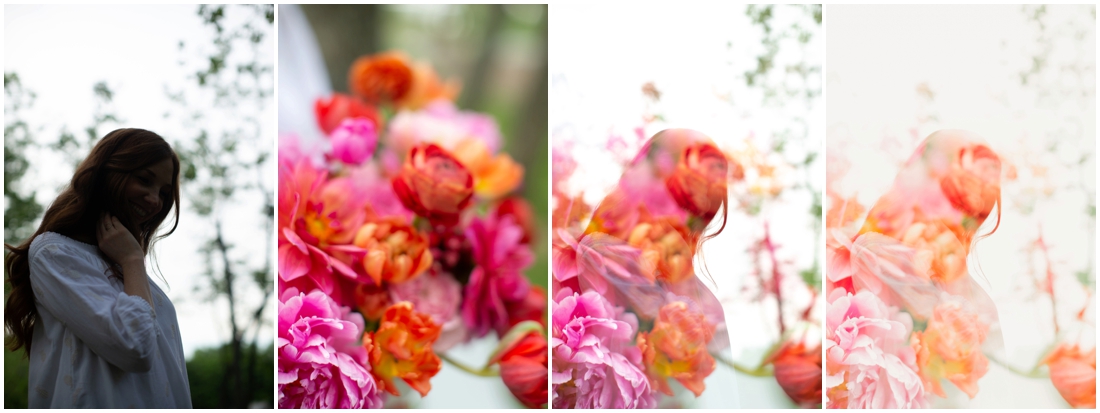

You can see how the slight color changes, background changes and exposures make for different end results! I hope that you have a blast taking double exposures. When you go out and shoot, give me a tag on Instagram — I'd love to check out what you come up with!
Related Post: Flat lay photography tips

love pinterest?


